

Access Attendance Tool
Brightspace Attendance Tool
Adding Attendance Link to Course Navbar
The Attendance Tool is not visible to students by default. To add the Attendance link to your Course Navbar, create a Custom Navbar and assign it to display in your course.
Note: Using a Custom Navbar replaces the College Default Navbar, so you will not receive future navbar updates from ODL LMS Support.
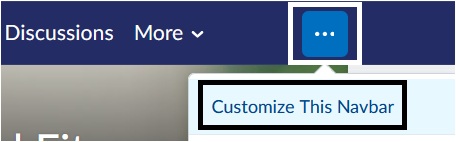
- In the course, select the three dots that appear on the right side of the Course Navbar. From the drop-down, select Customize This Course Navbar.
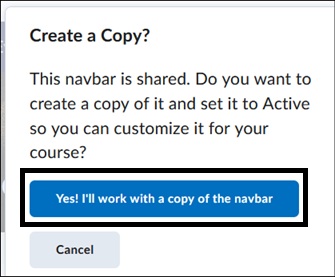
- Select Yes! I'll work with a copy of the navbar. This will bring you to the Edit Navbar page. It is recommended to rename the new navbar to easily find it and reuse it.
- Select the Add Links button under the Links area.

On the Add Links pop-up menu, select Attendance. Select Add.
Image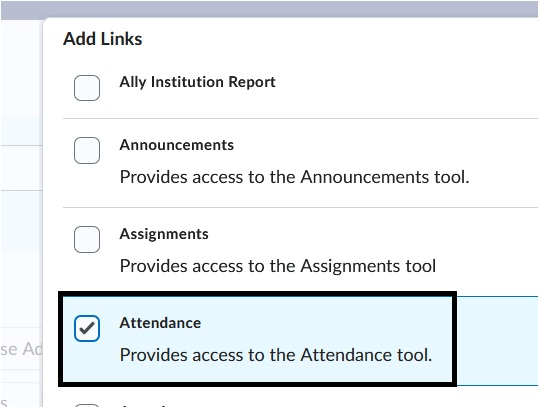
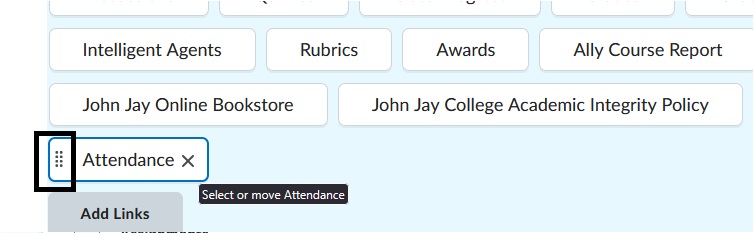
- Move the Attendance button by dragging and dropping it into the location you want on your course navbar.
- Select Save and Close.
Access the Attendance Tool
In a course, select Course Admin on the Course Navbar.
Image
Under Learner Management, select Attendance.
Note: You can also select the Attendance link on your Course Navbar if you have added it in the previous step.
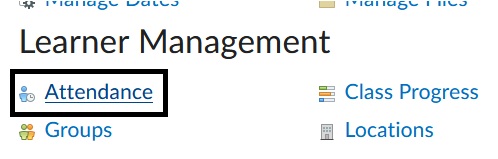
Create a New Register
Attendance Registers are entries that track attendance for a course or a specific activity.
Note: The Attendance Tool does not automatically connect to the Grade book. If you want to provide a grade for Attendance or participation, you will have to manually create a grade item.
On the Attendance page, select New Register.
Image
- Under Properties, enter a Name for the Register.
- Enter a Description if needed.
- Assign an Attendance Scheme. An Attendance scheme will be used to apply a symbol to each student's account such as Present, Absent etc. A customized Attendance scheme can be created on the previous page under Attendance Schemes.
Note: You cannot change the Attendance Scheme that is assigned to your register once attendance is entered.

- Under Cause for Concern, enter a percentage number, for example 80%. Cause for concern allows you to track students that fall below that set percentage and applies an icon next to a student's name.
- Under Visibility, select Allow users to view this attendance register if you plan on having the Attendance tool link on your Course Navbar.
Under Users, select to include all users in course or for a specific group or section.
Image
Under Sessions, enter Session Names. A session is one or more events in a course such as Week 1 or each day the class is in session. For additional sessions, enter the number and select Add Sessions.
Note: Brightspace requires you to save your attendance register first before adding additional sessions.Image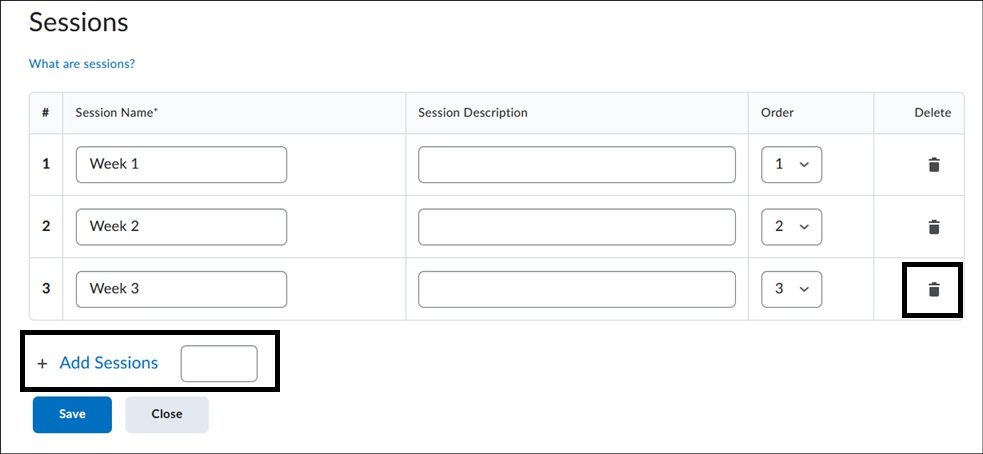
Edit Attendance Register
On the Attendance Register page, select the action arrow to the right of the Register Name in blue, select Edit Register.
Image
Enter Attendance
On the Attendance Registers page, select the action arrow to the right of the Register Name in blue, select View Attendance Data.
Image
- Select the Attendance Icon to the right of the Session Title.

On the Set Attendance Data page, under Attendance Status, select the correct status for each student from the drop-down menu.
Image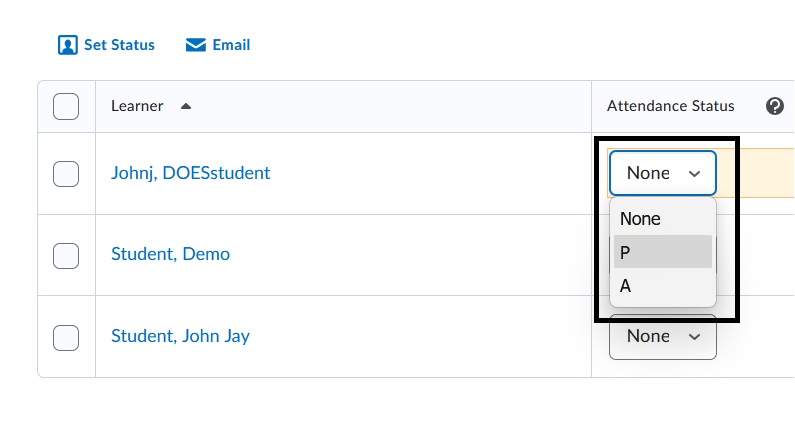
To set the status of multiple learners at once, select the box the left of the student's name and select Set Status. In the pop-up box, under Set Status for Selected Users, choose the status from the drop-down menu. Select Save.
Image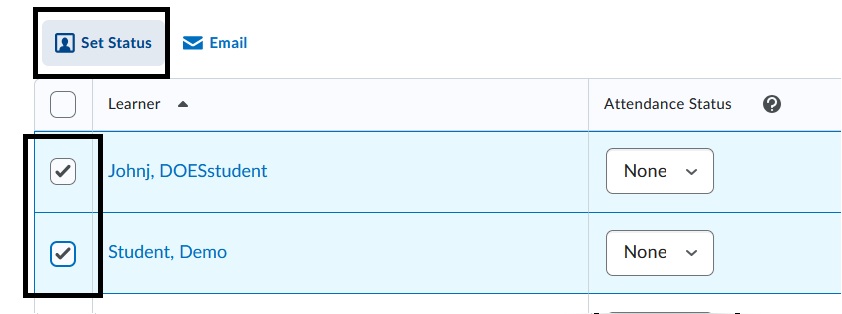 Image
Image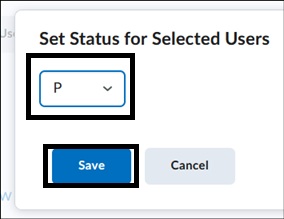
- Select Save at the bottom of the page to save all entered data.
View Create and Manage Attendance Registers
For more information and assistance, please email the Office of Digital Learning - Learning Management System Support at LMS.faculty@jjay.cuny.edu