Special Access and Accommodations in Brightspace
View instructions as a PDF: Special Access and Accommodations in Brightspace
Special Access for Quizzes
- Select Quizzes on the Course navbar to launch the Manage Quizzes page. On the Manage Quizzes page, click the blue quiz link to access the settings for that quiz. Note: these settings can be configured when the Quiz is created or set afterward.

- On the Quiz page, expand the Availability Dates & Conditions pane and select the Manage Special Access link.

- On the Special Access page, select the appropriate restrictions for the Quiz and click Add Users to Special Access.
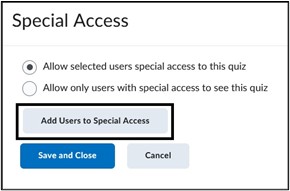
Note: By default, “Allow selected users special access to this quiz” is the chosen option. This allows you to set access for specific students while not impacting other students for the same quiz. The second option will restrict access to the quiz to ONLY those students who are selected for Special Access.
- Under Properties, set a Due Date, Start and End Date for the specific user. This setting can allow learner access at a different date and time than the rest of the class for this specific quiz.

Note: Due Date will not restrict access, only mark students late. The Start Date and End Date will restrict access to the quiz.
- Under Timing, adjust the time limit for a specific learner. Select Override time limit box to add additional time or set no time limit. The time limit can be increased by minutes, a multiplier such as 2 for double time or add extra time in minutes. Select the Override behavior when time limit is exceeded if you want to change how the quiz timer functions for the specific learner. For example, you can allow this learner to exceed the time limit to continue working, while the quiz will automatically submit for other students in the class when time has elapsed.

- Under Attempts, select Override attempts allowed if you want to grant the learner additional attempts. Under Attempts Allowed, select the number from the drop-down menu and select Apply. Advanced Attempt Conditions options will appear. This allows restrictions to be placed so that the user can only have an additional attempt if a certain score is met. Leave this area blank if no restrictions need to be applied.

- Under Users, select the learner(s) who will be granted special access. Select Save at the bottom of the page.

- On the Special Access page, the settings you have chosen for the user will be displayed. To edit these settings, select the Pencil Icon to the right. To remove access, select the X. Select Save and Close to retain these settings.

- The number of users with special access applied will be displayed on the Quiz settings page. Select Save and close at the bottom of the page to save all Quiz settings. The key icon will display on the Manage Quizzes page as a reminder that Special Access has been set.


Special Access for Assignments
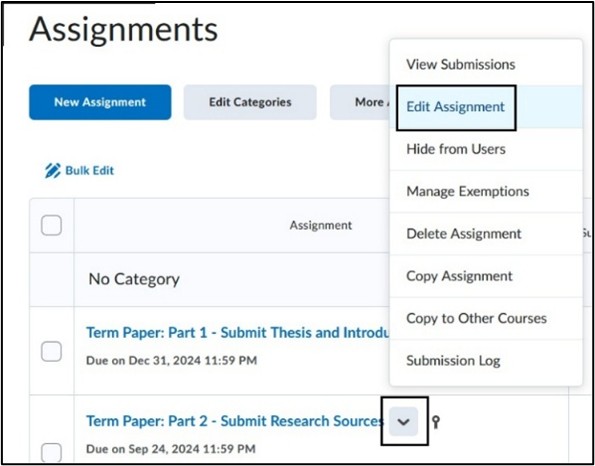
- In the course, select Assignments on the Course navbar.

- To the right of the Assignment link to be edited, click the drop-down arrow and select Edit Assignment. Note: these settings can be configured when the Assignment is created or set afterward.
- On the Assignment page, under Availability Dates & Conditions, select Manage Special Access link.
- On the Manage Special Access pop-up, select Allow users with special access to submit outside of the normal availability dates for this folder. This is the default selection and will give special access to a learner to submit their assignment at a different date/time than the rest of the learners. Select Allow only users with access to see this folder to restrict access completely to the assignment for selected learners. Select Add Users to Special Access.

- Under Properties, select the Due Date, Start Date and End Date for the special access to submit.
Note: Due Date will not restrict access, only mark students late. The Start Date and End Date will restrict access to submit.
- Under Users, select the learner that you want to grant special access. Select Save.

Note: For Assignment Special Access, it does not have an Override Attempt setting. This is because Brightspace assignments default to multiple attempts unless otherwise adjusted in the main Assignment settings under Submission & Completion.
- On the Manage Special Access pop-up, it will display settings chosen for the learner. To edit these settings, select the Pencil Icon. To delete these settings, select the X. Select Save and Close to return to the main Assignment.

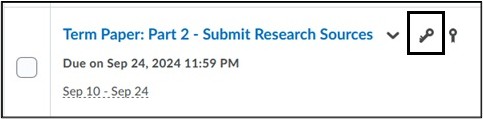
- The number of users with special access applied will be displayed on the Assignment page. Select Save and close at the bottom of the page to save all Assignment settings. The key icon will be displayed on the Assignment page as a reminder that Special Access has been set.

Accommodation Settings through Classlist
In Brightspace, accommodation settings for quizzes can also be set at the course level through the Classlist. If set at the course level, the modified time limit will automatically be applied to all quizzes in the course. If you need to adjust the due date, start and end dates, or number of attempts for a quiz, those will need to be applied manually using the Special Access settings above.
Note: John Jay LMS Support does not recommend disabling the Classlist tool within a course, as the Classlist tool is required to apply Accommodations. Instead of disabling the Classlist tool, instructors can remove the Classlist link from the Course navbar. After removing the Classlist link from the navbar, instructors can access the Classlist through the Course Admin page.
Access Customize your course navbar for more information.
- In the course, select More on the Course navbar. Select Classlist from the drop-down menu.

- On the Classlist page, locate the student to receive accommodations and select the drop-down arrow to the right of learner’s name. Select Edit Accommodations.

- Modify the time limit for the learner. For example, if the learner receives accommodation of double time for all quizzes, enter 2 under the Multiplier. This will grant the student double time for any quiz. Select Save to retain changes.

- The Accommodation icon will appear next to the learner’s name on the Classlist page and on the Class Progress page for the learner, next to Quizzes on the left side menu.

For more information and assistance, please email Department of Digital Learning - Learning Management System Support at LMS.faculty@jjay.cuny.edu