Create and Manage Content in Brightspace
Instructors can use the Content page to add and organize course materials through modules, sub-modules, and topics (individual items such as files). Clearly labeled, consistently structured, and logically organized content enhances accessibility and supports student success.
Access Content and Create Modules
- Select Content on the Course navbar.

- On the Content page, the first item is Overview. The Overview field is a place to add your syllabus or a general message about the course. Note, the Overview header itself cannot be renamed. Select the Add a welcome message text to open a text editor. The Bookmarks area is user specific, and user created; it will list any items that you have bookmarked for easy access within Content. It does not allow you to bookmark items for your students. The Course Schedule will automatically populate topics and other course items that have a Due Date set. You cannot add manually created dates on the page itself.
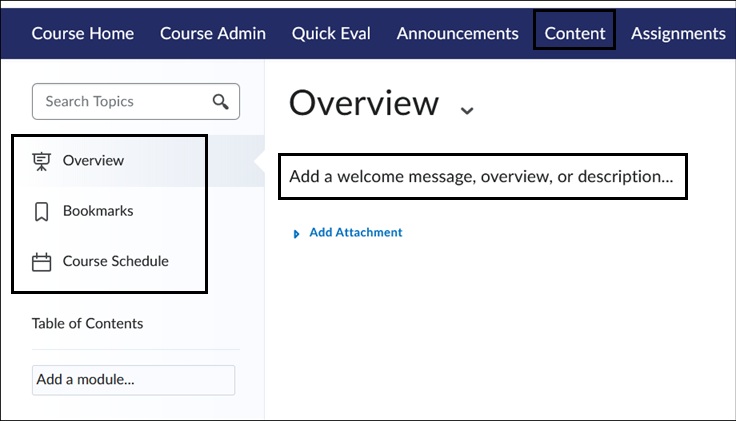
- Under Table of Contents, is the Add a Module field. This is where you create modules for the course. For example, create a module for each week of the course or by specific name such as Assignments. Select the Add a Module field and enter a title for the module.
View Add a Module video for more information.
Add Sub-modules and Organize Modules
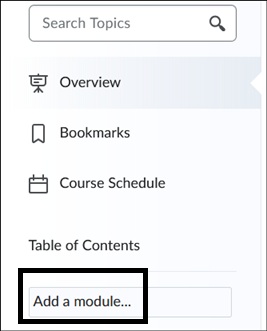
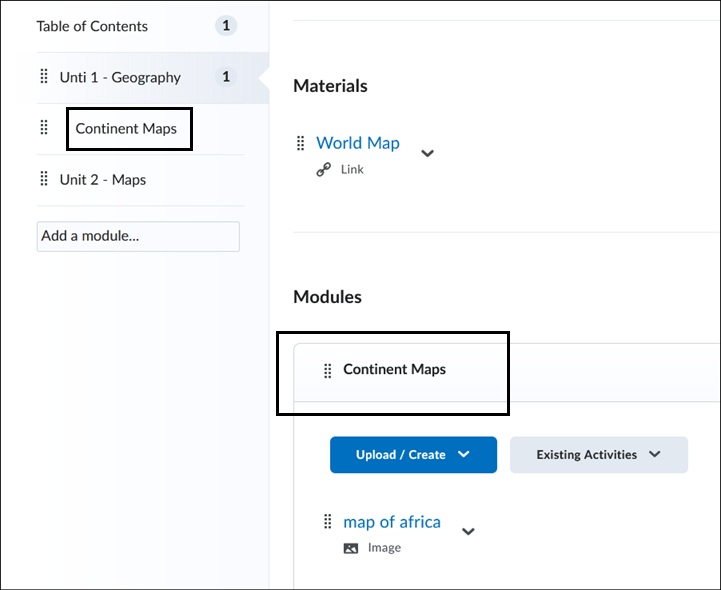
- To create a sub-module, select a module under the Table of Contents. Once within the module, scroll to the bottom and select Add a sub-module. Enter a title for the sub-module.
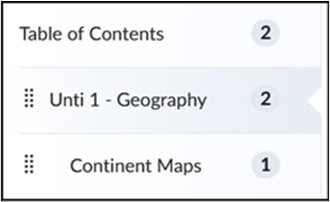
- The sub-module will appear indented on the Table of Contents under the main module it resides in.
Once multiple modules have been created, if these modules need to be reordered there are two options that can be used:
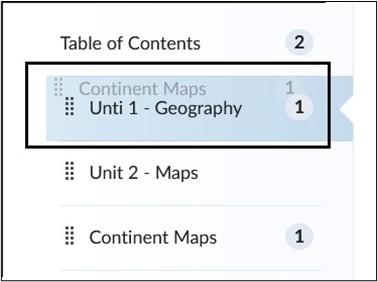
- Drag and Drop Reorder Method –
Place the cursor over eight dot tile of the module or sub-module and drag it up or down and drop it into order.
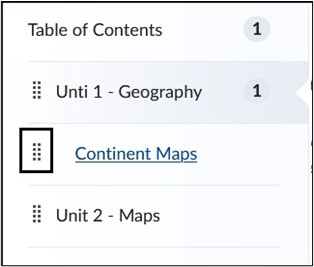
Note: If you are using the drag/drop method pay attention to the color identifiers that are used to show if you are moving the module above or below another module or if you are placing it within a module.
To move the module above or below a main module, when dragging, look for the solid blue line. Once dropped, it will place the module above or below it.
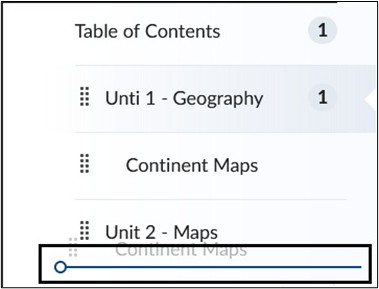
To move a module within another module and make it a sub-module, when dragging, look for the main module to turn solid blue. Once dropped, that module will then show as indented and be considered a sub-module.
- Action Menu Reorder Method –
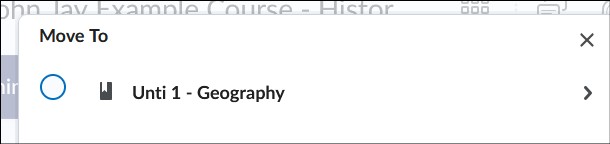
To reorder a module, access a module so that you are within it. Select the downward arrow action menu to the right of the Module Title. Depending on the current order of the module, you will see Move Up, Move Down and Move To options. Selecting the Move Up or Move Down setting will move the module’s order on the Table of Contents menu. Selecting Move To will allow you to move the module into another module. This will make that module a sub-module.

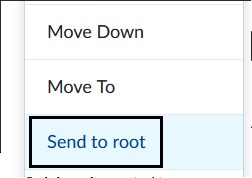
To change a sub-module to a main module, access the sub-module from the Table of Contents. Select the downward arrow action menu to the right of the Sub-module Title. Select Send to Root. This will make the sub-module a main module on the Table of Contents and keep it within the same order.
Edit Modules and Add Topic Items
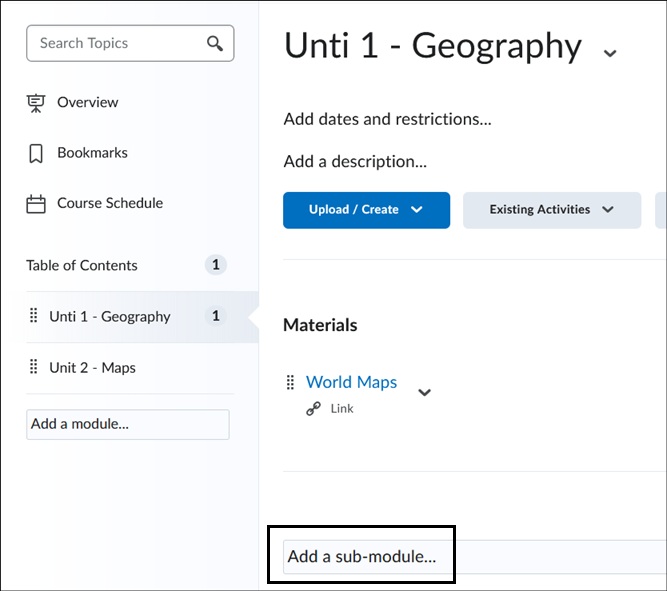
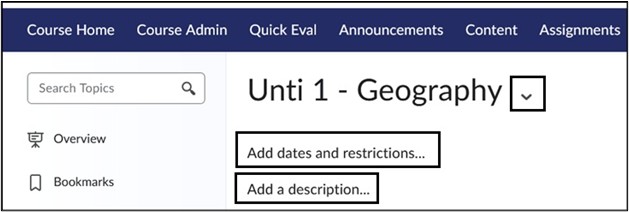
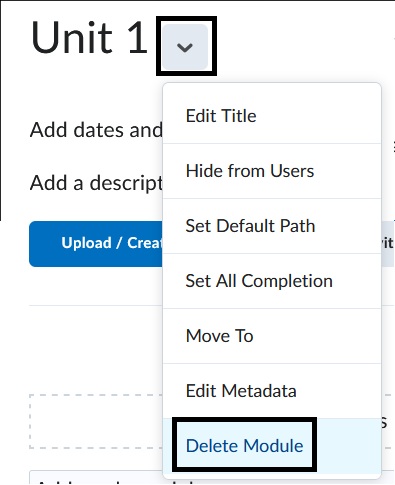
- Once the module is created, it will appear on the right-hand side with the same title. If you need to edit the Title of the module or delete the module, select the downward arrow to the right of the title name. Select the Add dates and restrictions field to add specific dates for the module. Select the Add a Description field to add information about the specific module.
To add a topic item (individual course materials) into a module, select Upload/Create button. Select from a list of topics, for example to attach a file such as PDF, select Upload Files.
Image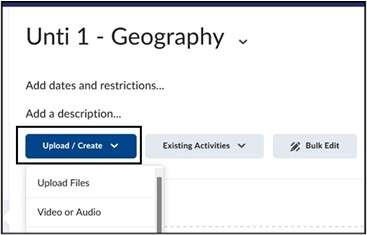
View Create a New Topic for more information on specific topic types.
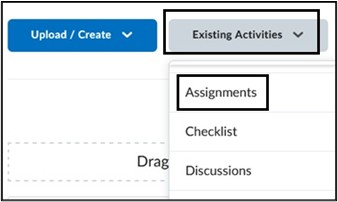
- If you have created other assessments such as Assignments or Discussions elsewhere in the course and would like to link them within a module, select Existing Activities. Select the tool name from the drop down and the specific assessment you would like to add.
Note: Third-Party tools such as VoiceThread, Turnitin, Perusall and WeVideo (Formerly Playposit) are also listed under Existing Activities. Access Add Third-Party Tools for more information.
View Add an Existing Activity video.
Delete Modules
Instructors can delete content modules; however, please note that deleted modules cannot be restored. Once a module is deleted, it is permanently removed and cannot be recovered by ODL LMS Support.
- To delete a module, select the Module on the left side menu. At the top of page where you see the Module Name, select the downward arrow and select Delete.
- There will be two selections to choose from –
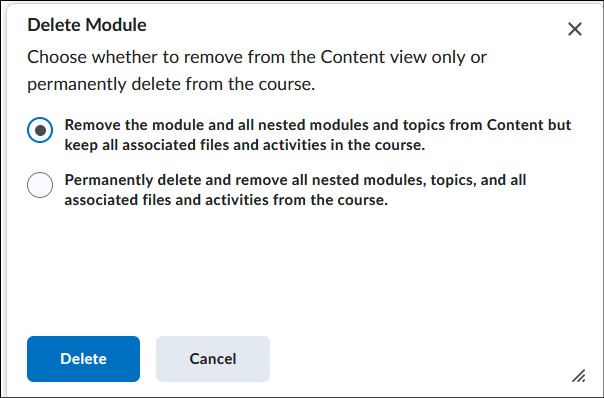
- Remove the module and all nested modules and topics from Content but keep all associated files and activities in the course.
This means that you will be deleting the Module itself but attached files will still be stored in Manage Files. Assignments will still be in the Assignments tool.
- Permanently delete and remove all nested modules, topics, and all associated files and activities from the course.
This means you are deleting both the structure (module in Content) and the actual files and assessments within the course. Please only use this option if you are sure, you no longer need it as it cannot be recovered.
- Select Delete to complete process.
View Create and Manage Content in Brightspace Video:
For more information and assistance, please email Office of Digital Learning - Learning Management System Support at LMS.faculty@jjay.cuny.edu